|
|
|
|
|
|
|
|
|
|
|
|
|
Wearable Art |
|
I have decided...I am a designer, so get on with the designing! |
| However, it
is much easier to do that with a pattern you don't have to fiddle with too
much. Why not a bog coat?
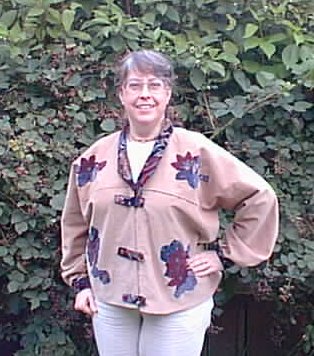
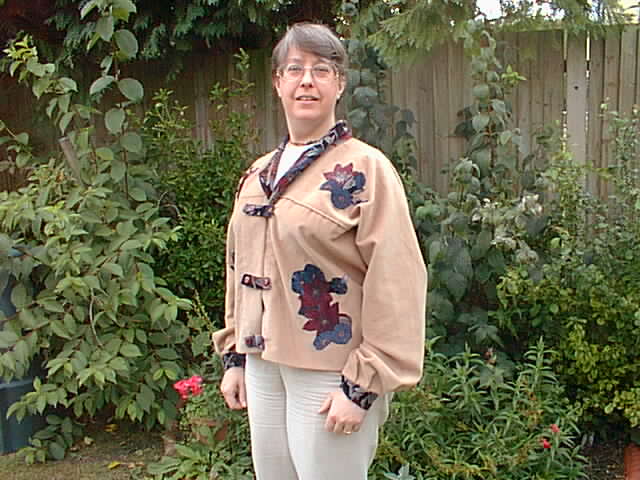
What is a Bog Coat anyway? Somewhere in the Scandinavian countries, they discovered a man's body in the Peat Bog. His clothing had been preserved. They worked out that his coat had been constructed on the simple principle of a rectangle. As it was so easy, people took the idea and began to make it up. Then Others who didn't like boring clothing decided it would be fun to Embellish it in different ways. Wonderful!! |
The bog coat Then I had a go at seeing if I was somewhat near right. The only thing is, I'm not too keen in making up something only for fit...I mean what a waste of time, as you don't wear it. So, I thought, "Well, it won't be that far off, so I will make it interesting after all. Here is my first
attempt. |
| Here are some awesome
photos of the humble bog coat given new life! Linda Nelson Bryan Okay it will take me a long time to get to this standard! Larkin Van Horn More Wearable Art Amy's Wearables If you are interested in Wearable
art, this book looks good. |
I had a piece of tan
corduroy that I got for £1 a metre. Just right for what I had measured.
After I cut it and sewed it, I chopped up a velvet skirt that was black
with autumnal colours that I had bought for about £2 at a charity shop. I
"fussy cut" some of the flowers and laid them into floral
arrangements. Then I used temporary spray adhesive to put them in place. I
zigzagged round each piece with black thread.
I also cut a fold over collar, and cuffs. The cuffs bring the fullness of the sleeve in, which makes it much more manageable. I saw this idea on a bog coat a friend of mine had made. I really didn't like the fullness at the bottom of the jacket, and will adjust the measurements somewhat next time...or do something totally different!! However, this time I used bits of the hem to make a band that I could use to pull the back in a bit like darts or tucks. Then I used bits of the waistband to make the closures at front. I had a store of buttons from my friend's mum. She happened to have about 10 of these rust buttons that worked much better than the black I had originally thought of. I only made button holes on one side of the closures. The other end, and the ends of the band at the back are just attached with sewing the button through all thicknesses. After this photo was taken, I sewed down the tucks, as they flopped around too much, and I didn't want to be forever adjusting them. |

 |
|